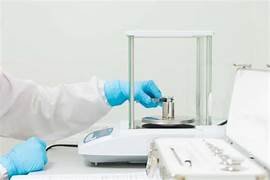
In the realm of scientific experimentation, precision and accuracy are paramount. Laboratory glassware serves as the vessel through which meticulous measurements and reactions unfold. However, to maintain reliability in scientific results, it’s crucial that laboratory glassware undergoes calibration. This process ensures that measurements taken within these vessels are accurate and consistent, laying a solid foundation for trustworthy scientific research.
What is Calibration?
Calibration, in the context of laboratory glassware, refers to the meticulous process of testing and adjusting instruments to confirm their accuracy and precision. For glassware, this primarily involves verifying volumetric measurements—such as those provided by pipettes, burettes, volumetric flasks, and graduated cylinders—against recognized standards. These standards are typically traceable to national or international metrology institutes, ensuring uniformity and reliability across different laboratories.
Why is Calibration Important?

Accuracy of Measurements: Accurate calibration ensures that the volumes indicated by the glassware correspond precisely to the actual volumes contained within. This accuracy is crucial for achieving reliable experimental results.
Consistency Across Experiments: Calibration helps maintain consistency in measurements over time and across different users. This consistency reduces variability and enhances the reproducibility of experimental results.
Compliance with Standards: Many industries and regulatory bodies mandate regular calibration of laboratory equipment to comply with quality assurance standards. Adhering to these standards is essential for research credibility and regulatory compliance.
How is Glassware Calibration Performed?
The calibration process typically involves the following steps:
Initial Inspection: Examine the glassware for any visible defects, such as scratches, chips, or uneven etching, which could affect accuracy.
Weighing Method: For volumetric flasks and pipettes, a weighing method can be used where the mass of water is measured to verify the volume based on the density of water at a specified temperature.
Gravimetric Method: This involves measuring the mass of liquid dispensed or collected by the glassware and comparing it to the expected volume based on the density of the liquid.
Meniscus Reading: Ensure that readings are taken at the meniscus, the bottom of the concave curve formed by the liquid’s surface due to surface tension. Proper meniscus reading is crucial for accurate volume measurement.
Adjustment (if necessary): If discrepancies are found during calibration, adjustments may be made to correct the glassware’s calibration. This may involve adjusting markings or recalibrating the instrument.
Documentation: Record all calibration activities, including dates, methods used, and results obtained. This documentation is critical for traceability and audit purposes.
Importance of Regular Calibration
Regular calibration ensures that laboratory glassware maintains its accuracy over time. Factors such as wear and tear, environmental conditions, and frequency of use can impact the accuracy of glassware. Therefore, periodic calibration—usually recommended annually or according to manufacturer guidelines—is essential to verify and maintain accuracy.
Conclusion
In conclusion, understanding glassware calibration is fundamental to ensuring the accuracy and reliability of laboratory measurements. By adhering to calibration procedures and standards, scientists and researchers uphold the integrity of their work and contribute to advancements in scientific knowledge. Whether you’re conducting groundbreaking research or routine analyses, calibrated glassware plays a pivotal role in achieving precise and reproducible results. Embrace the meticulousness of calibration, for it is the bedrock upon which scientific excellence stands.
